Introduction:
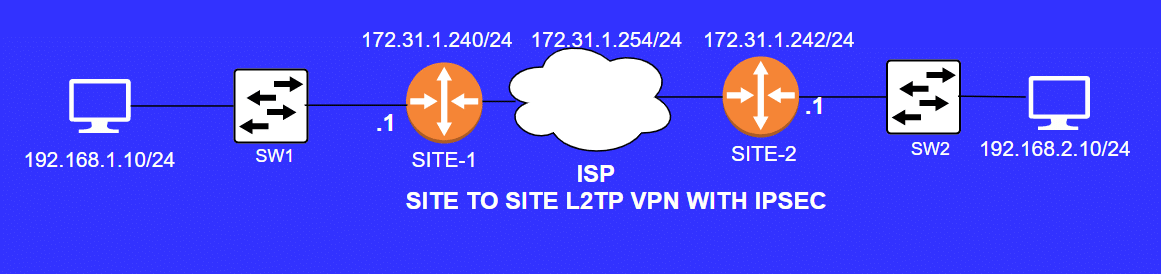
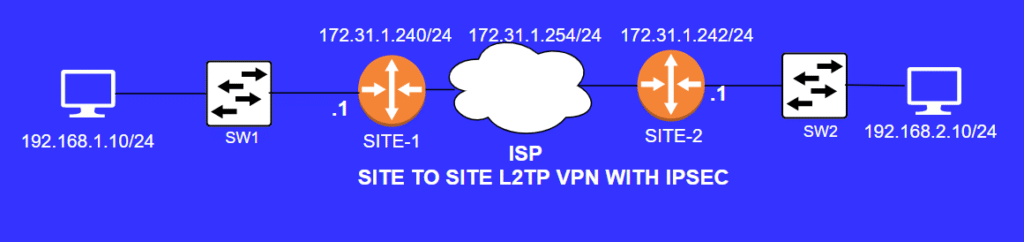
In today’s interconnected world, securing your network communication is paramount. One effective way to achieve this is by setting up a Site-to-Site VPN (Virtual Private Network) using MikroTik routers and the L2TP/IPsec protocol. This type of VPN ensures that data traffic between two remote locations is encrypted and secure. In this step-by-step guide, we’ll walk you through the process of configuring a MikroTik Site-to-Site VPN with L2TP/IPsec.
Prerequisites of L2tp with IPSec on Mikrotik:
Before you start the setup process, make sure you have the following:
- Two MikroTik routers with RouterOS version 6.44 or later.
- Access to both routers with administrator privileges.
- Basic knowledge of MikroTik RouterOS and networking concepts.
- Static IP on L2tp-server router.
Step 1: Accessing RouterOS Interface
- Connect your computer to the MikroTik router via an Ethernet cable or access it over the network through its IP address (default is usually 192.168.88.1).
- Open a web browser and enter the router’s IP address in the address bar.
- Log in with your admin credentials.
Step 2: Basic Configuration
- Click on “IP” in the left-hand menu and select “Addresses.” Add an IP address to the WAN interface of both routers as follows:
- Router 1 WAN Interface: In our case 172.31.1.240/24 is WAN IP Address.
- Router 2 WAN Interface: A In our case 172.31.1.242/24 is WAN IP Address.
- Now, let’s configure the LAN settings for both routers:
- Router 1 LAN Interface: Go to “IP” -> “Addresses” and add an IP address for the LAN interface, such as 192.168.1.1/24.
- Router 2 LAN Interface: Similarly, go to “IP” -> “Addresses” and configure the LAN interface with an IP address, e.g., 192.168.2.1/24.
- Next, create static routes on both routers to allow traffic to flow between LAN networks:
- Router 1: Go to “IP” -> “Routes” and add a route for the remote LAN network (192.168.2.0/24) with the gateway set to the IP address of Router 2’s LAN interface (e.g., 192.168.1.2).
- Router 2: Follow the same procedure, adding a route for the remote LAN network (192.168.1.0/24) with the gateway set to the IP address of Router 1’s LAN interface (e.g., 192.168.2.1).
- Now, let’s set up NAT (Network Address Translation) to allow LAN devices to access the internet:
- Router 1: Navigate to “IP” -> “Firewall” -> “NAT,” and under the “Srcnat” tab, click on the “+” sign to add a new rule. Set the chain to “srcnat,” source address to your LAN network (e.g., 192.168.1.0/24), and action to “masquerade.” This rule allows devices on the Router 1 LAN to access the internet.
- Router 2: Follow the same procedure on Router 2, but configure the source address as your LAN network (e.g., 192.168.2.0/24).
- Finally, ensure that both routers have DNS servers configured under “IP” -> “DNS.” You can use your ISP’s DNS servers or any preferred public DNS servers like Google’s (8.8.8.8 and 8.8.4.4).
For SDN tutorials you can explore our site https://skillset-bd.com/
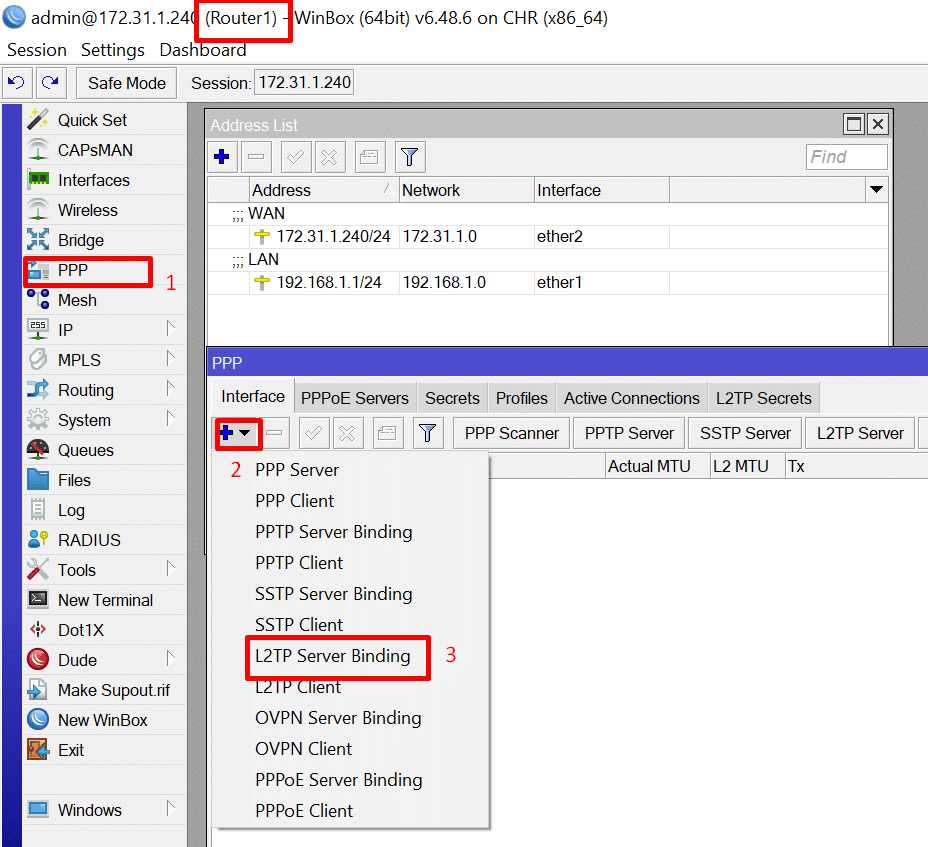
Step 3: L2TP Server Configuration (Router 1)
- Go to “PPP” -> “INTERFACE.”
- Click on the “+” sign > L2TP Server Binding.
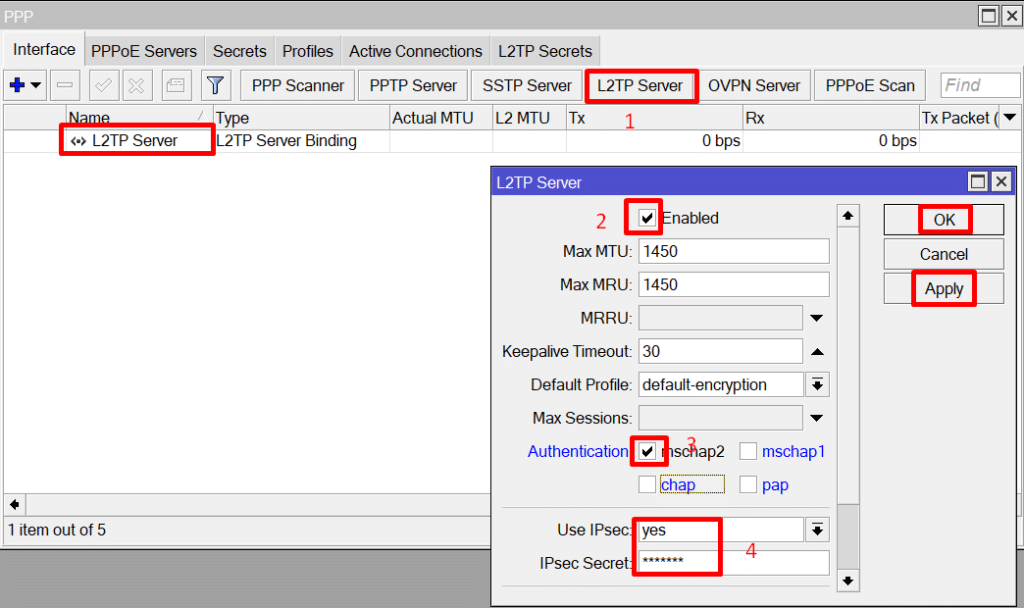
- Set a name for the server and Click on L2TP Server to Enable Service.
- Chose Authentication as Maschap2
- Enable “Use IPsec” yes and set secret which will use to connect Client Mikrotik Router(Router 2)
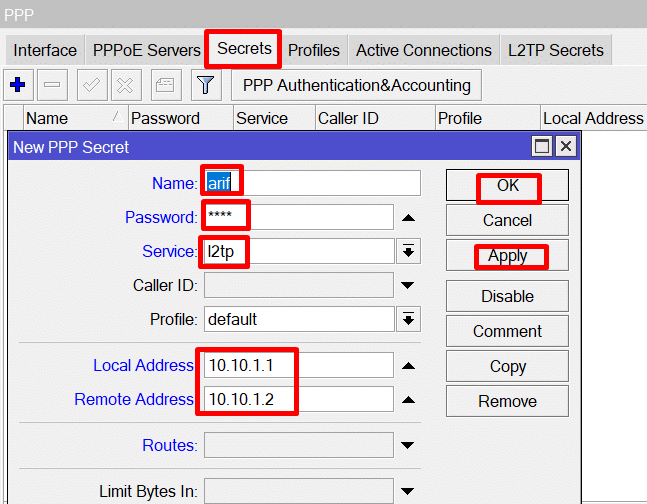
Step 4: User Configuration
- Go to “PPP” -> “Secrets tab.”
- Click on the “+” sign > New page will pop up.
- Set user name, password,service. It will use when we connect mirotik client router.
- Put local address and remote address which will be use when client try to connect mikrotik server it will form a virtual tunnel using this ips. no need to assign this ips on interface.
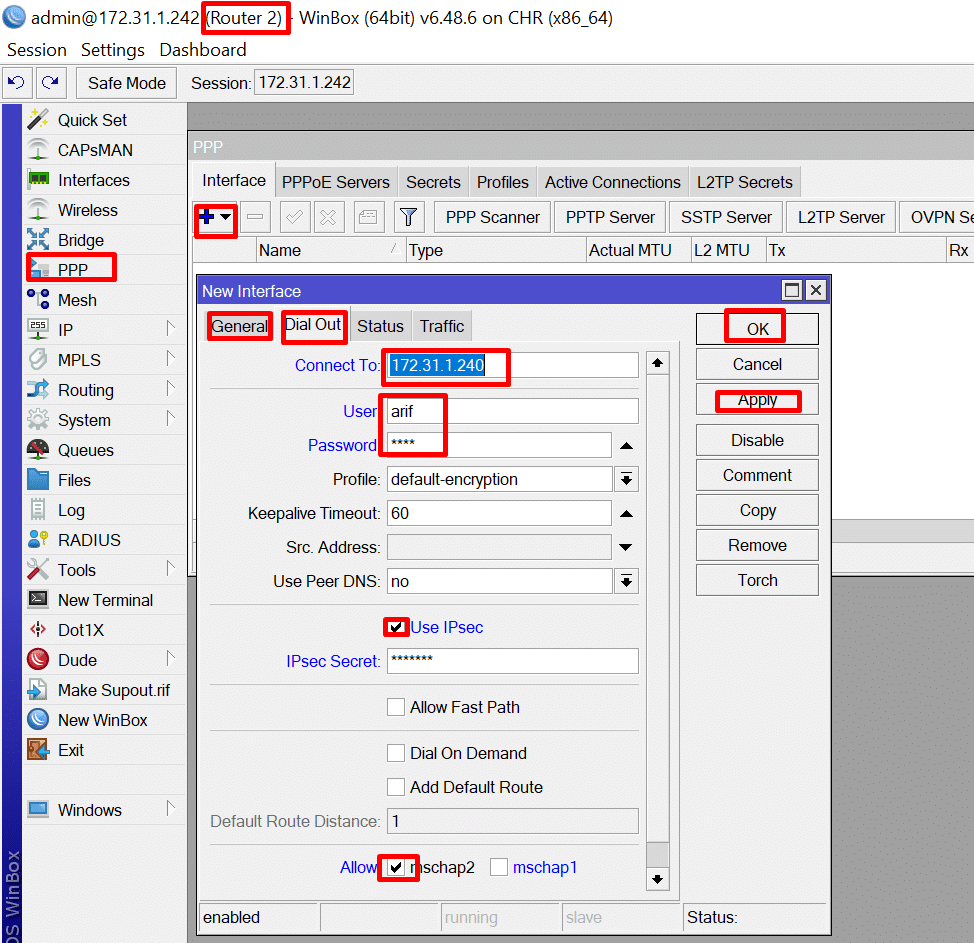
Step 5: L2TP Client Configuration (Router 2)
- On Router 2, navigate to “PPP” -> “L2TP Client.”
- Click on the “+” sign to add a new client.
- Sat the name, click Dial Out tab enter the public IP address of Router 1 in the “Connect To” field.
- Enter the username and password for authentication which we created on router 1.
- Configure the IPsec Secret to match the secret what set on Router 1 click apply and ok.
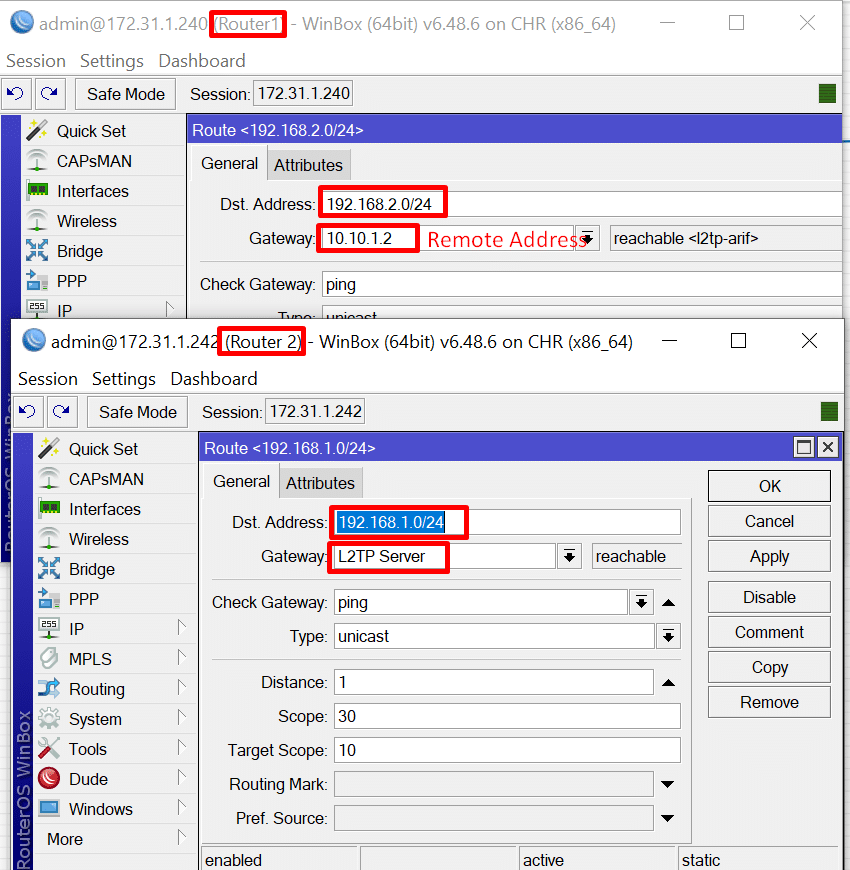
Step 7: Add Route on Both Routers
- On Router 1 & 2, navigate to “IP” -> “Routes”
- Click on the “+” sign to add a new route.
- On Router 1 add Local network of site 2 which you want to access from your network and add gateway ip as remote address which is created on secrets filed.
- On Router 2 add Local network of site 1 on dest.address field which you want to access from your network and add L2TP Client as gateway which is created on router 2.
- Now You are good to go for testing.
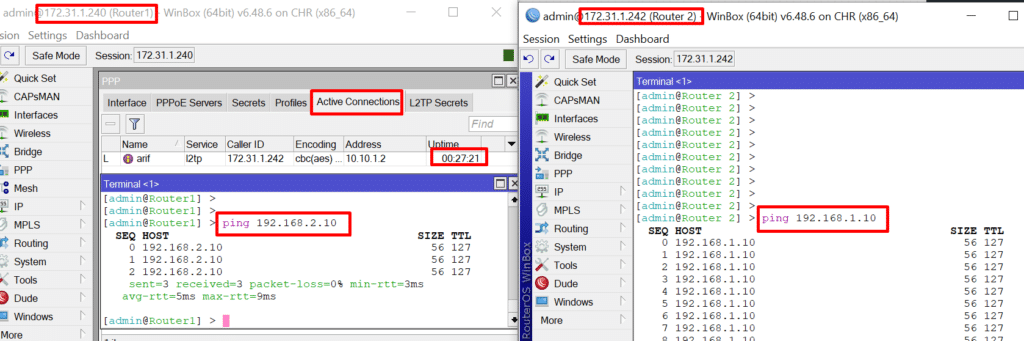
Step 8: Testing the VPN
- On Router 1, go to “PPP” -> “Active Connections” to ensure the L2TP connection is established.
- Verify the VPN status on Router 2 as well.
- Test the connection by pinging devices on the remote network.
For more details you can go for official documents https://mikrotik.com
Congratulations! You’ve successfully set up a Site-to-Site VPN with L2TP/IPsec using MikroTik routers. This secure connection allows you to transfer data between the two locations while ensuring the confidentiality and integrity of your data. Remember to regularly update your router’s firmware and review security settings to maintain a high level of network protection.